Pizza night with yeast-free pizza dough

Hello all!

How’s everyone doing?? I am calling today’s recipe use-what-you-got pizza! Because really that’s how it came together. I didn’t have all the traditional ingredients, so this is NOT your traditional pizza, but it is oh-so-yummy! Let’s start!

pizza dough

Yeast-free pizza dough

  • 1-1/2 cups whole wheat flour
  • 1 cup corn flour
  • 3 tsp baking powder
  • Pinch of salt
  • 1 tbsp evoo
  • 3/4 cup warm water
  1. Preheat oven to 400F and grease pizza pan.
  2. Whisk flours, baking powders and salt in a large bowl.
  3. In a smaller bowl mix water and evoo. Slowly add water mixture to flour mixture until the dough is formed into a ball. If you need more water, be sure to add it a tablespoon at a time.
  4. Knead the dough a few times while in the bowl and spread it on the prepared pizza pan.
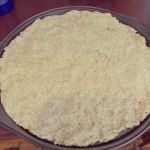
  5. Bake at 400F for 15 minutes or until lightly browned.

homemade pizza

Pizza toppings

  • 1/2 lb of ground beef
  • 1 green pepper, thinly sliced
  • 1 large onion, thinly sliced
  • 2 garlic cloves, minced
  • 1 basil cube (frozen basil – a liitle bit smaller than an ice cube)
  • 3 tbsp tomato paste
  • Salt, to taste
  • Freshly ground black pepper, to taste
  • Dash of oregano
  • Dash of aged red wine vinegar
  • 1/4 cup chicken stock or water
  • 1/4 cup salsa sauce
  • Shredded cheese for sprinkling on top (I only had the cheddar marble kind)
  1. Cook ground meat on medium heat until nicely browned. Stir frequently.
  2. Add in onions, green pepper, and garlic. Cook covered until the vegetables are soft (a few minutes).
  3. Add in tomato paste, basil, dash of salt, black pepper, oregano, vinegar, and chicken stock or water. Mix everything in and reduce heat to simmer and cover for 7 to 10 minutes.
  4. Add in salsa, cover and let it simmer for 2 minutes. Remove from heat. Taste and adjust salt if needed.

Now, you’re ready to put your pizza together! Just toss the toppings on top of the dough, sprinkle more oregano if you wish, some cheese, and pop it back in the oven for another 10 minutes or until the cheese melts.

homemade pizza dough & toppings

I hope you enjoy your pizza as much as we did! The smell was amazing!! I didn’t even get a chance to take a final product shot. My husband loved it and I am pleased. I really enjoyed the corn flour taste in the pizza dough; it tasted like Mexican tortillas. It was yummy. I will definitely be making this pizza again. The husband did request a fluffier dough…gotta figure that one out!

I hope this post inspires you to use ingredients you already have at home. If you try this recipe out please let me know. Thanks so much for stopping by!

 

Vegan Apple Cornbread

Hello all!

For some odd reason, my pictures do not seem to want to load. It is weird. And I’m too tired to investigate. It could be my phone since I’m posting from my cell. Which by the way is super painful since I have pre developed blisters on my thumbs from just a few hours of sanding. Yes, it is sad.

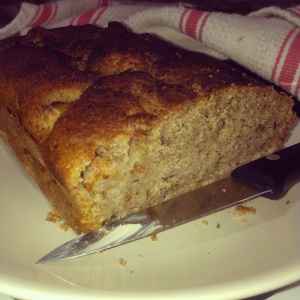
vegan apple cornbread

The bread though is good – even though I kept it in the oven a little longer than needed. But the husband liked it and didn’t even mentioned its way past golden colour. So please, when baking this bread, set your timer and don’t forget about it like I did. On my defense though, I was baking and trying to get ready to go into the city all at once. It is hard to do.

Ingredients

  • 2-1/3 cups whole wheat flour
  • 1 cup corn flour (not cornstarch, it is more like super extra fine cornmeal)
  • 1/2 cup evoo
  • Scant 2/3 cup sugar
  • 1 tbsp baking powder
  • 1 tsp salt
  • 2 tsp vanilla
  • 1-2/3 cups almond milk
  • 3 tbsp flax dissolved in 9 tbsp water
  • 2 small apples – peeled and cut into small chunks. + 1 tbsp maple syrup drizzled on top (maple syrup is optional)

Directions

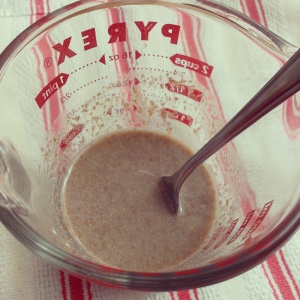
1. Dissolve flax in water. In a small container (I used a 2-cup glass measuring cup) add 3 tbsp flax and 9 tbsp water. Whisk as you add the water. Let it rest in refrigerator for at least 15 minutes.

flax mixture

*wait 15 minutes to continue*

2. Preheat oven to 350F and grease 2 small bread pans.

3. In a large bowl mix in evoo and sugar.

4. In a medium bowl combine the flours, salt and baking powder.

5. Take out flax mixture – it should be thicker – and whisk in milk and vanilla.

6. Alternating, add milk mixture and flour mixture to large bowl (evoo & sugar). Combine well.

7. Add in apples and stir.

8. Pour batter in prepared pans and bake at 350F for 10 minutes, decrease temp to 335 and continue baking for an additional 45 minutes or until toothpick inserted in centre of bread comes out clean.

apple cornbread

This is not your typical cornbread. The taste is nuttier because of the flax. The corn flour gives it a very mild corn flavour. The apples are just an awesome added bonus.

Please let me know if you try this recipe out. Hope you enjoy it!

Thanks for stopping by 🙂

PS. Will get some pics up soon!

On and Off and On again…

Hello online world!

The past few weeks have been nerve wrecking. I have had to live without facebook, without whatsup, without instagram, without anything…It’s been tough, but I managed to survive.

We have not had an internet connection for quite a while. Until last week. Today, I officially got WiFi again.

We have been doing some home renovations. It hasn’t been pretty. The floors have been nasty. The furniture has been covered in sheets that were once white (yea, not a bright idea), and the air has permanently turned dusty.

The kitchen is now somewhat usable again. I’m sure it is happy to be used again. It was off-limits for a while, then we took a 4-day break and got things cleaned up. I made 2 to 3 meals a day just in case the kitchen became off-limits again. I froze all the extra meals. I was tired of take-out. Our last day of eating out was on Saturday. Yesterday, we ate at our pastor’s home. Today we’re eating at home.

The renovations are not done, BUT the floors are cleaned. The shower stall has been scrubbed clean and the tables and chairs and other pieces of furniture have been brought back to the room they’re supposed to be in. My husband has an ear infection and so we’ll be taking yet another break from renovating (which is so nice).

And so I’m online again. I will be visiting the grocery store later today and visiting this blog again tomorrow.

Oh how I’ve missed you all!!!

Thank you for stopping by! Have a great Monday!!!! 🙂

Try It Out Tuesdays: Soft whole wheat biscuits

Hello everyone,
Today has been one of those rainy then humid then rainy then gloomy days that just make you want to stay indoors curled up in a blanket with a nice cup of tea.
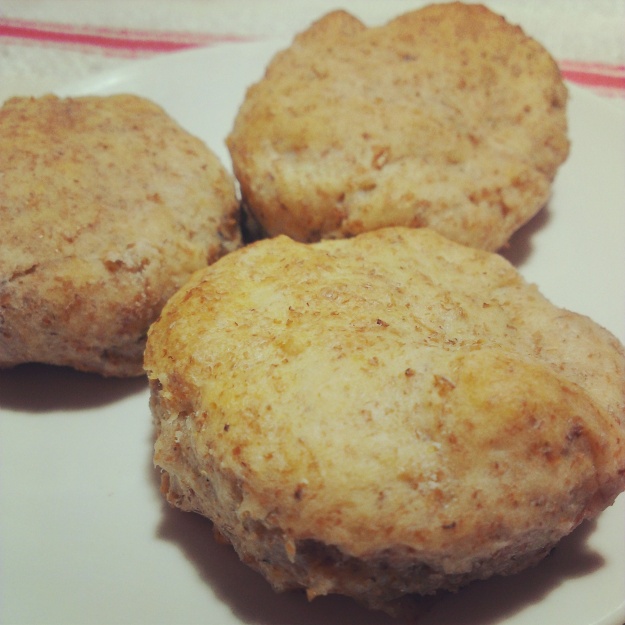
There’s something about tea – you don’t enjoy it as much unless it is accompanied by a biscuit. So, I went on a mission to make soft, moist biscuits even though all I had was whole wheat flour.

image

Ingredients
2 cups whole wheat flour
1.5 tsp baking powder
1/2 tsp salt
4 tbsp evoo
1/2 tsp baking soda
1/2 cup plain yogurt
1/2 cup almond milk

1. Preheat oven to 425F

2. Mix together in a medium sized bowl the flour, the baking powder and the salt. Then add in evoo & mix well.

3. In a separate small bowl (I did this in a large measuring cup) mix in the yogurt and almond milk. Add in the baking soda and mix well.

4. Add the wet ingredients into the dry ingredients and mix until a dough is formed. If the mixture is too dry, add a little bit of almond milk – a spoonful at a time until you get the dough into a rolling consistency. Knead dough 2 or 3 times.

5. Turn out dough into a lightly floured surface and roll it out to about a 3/4″ thickness and cut biscuits. I don’t have a rolling pin in my new home, so I just extended my dough. It is easy to handle. I also just used a drinking glass to cut out my circles. I dont have a biscuit cutter.

6. Bake in a cookie sheet for 12-15 minutes at 425F. Enjoy!!

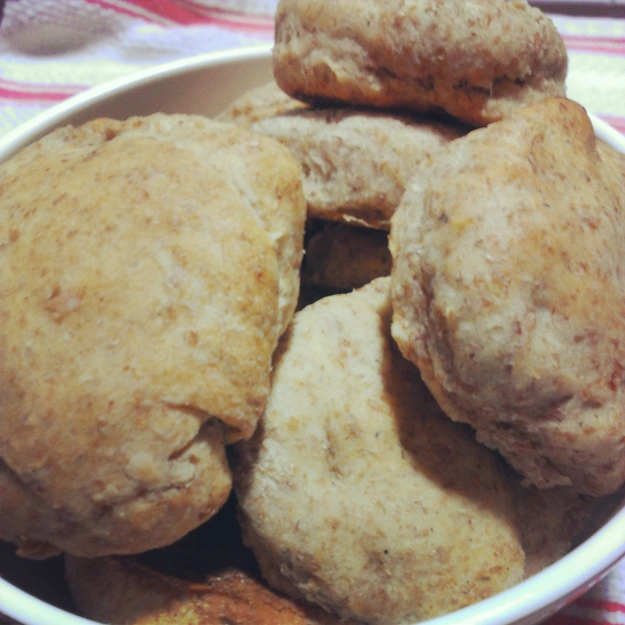
image

My biscuits came out a little smallish so I was able to get 15 of them out of the dough. I imagine you should be able to get 8-10 regular sized biscuits if you follow this recipe.

Thanks so much for stopping by today. Hope you’re having a great week!! If you try out this recipe, let me know.

Joh.

Try It Out Tuesdays: Apple Bread

Hello Hello Hello

Happy Belated Canada Day!

Yesterday was a pretty awesome day…the husband + the boys spent the day at the beach. It was just lovely! The water was still too cold for us to go swimming in – although I saw some kids who didn’t seem to mind the cold water – but the boys went in and had lots of fun just playing at the beach.

When we got home, we were all pretty exhausted. The husband and boys took an afternoon nap while I baked some delicious apple bread in the kitchen.

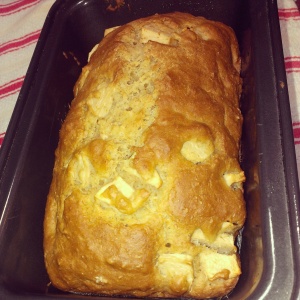
apple breadThis recipe makes 2 small loaves

Ingredients

  • 1 cup whole wheat flour
  • 1-1/2 cup all-purpose flour
  • 2 tsp baking powder
  • 1/2 tsp baking soda
  • pinch of salt
  • 3 egg whites
  • 1/3 cup grapeseed oil
  • 1/2 cup coconut milk
  • 3/4 cup plain natural yogurt
  • 2 tsp vanilla extract
  • 2 medium apples – peeled and cut into small squares

Directions

  1. Preheat oven to 350F and prepare baking pans.
  2. In a medium bowl mix all the dry ingredients together – flours x2, baking powder, baking soda, and salt.
  3. In a large bowl mix all the wet ingredients together – egg whites, milk, yogurt, oil and vanilla extract.
  4. Pour the dry ingredients into the wet ingredients, slowly. Make sure to mix thoroughly.
  5. Pour batter into pans and bake at 350F for 15 minutes and then at 330F for 30 minutes or until toothpick inserted in the centre of loaf comes out clean.

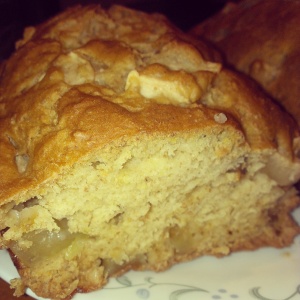
apple bread I am just getting the hang of the oven at my new home. I find 350F is a little too hot for my little bread loaves. As you can see in the picture, the change in temperature though worked great! The outside was nice and golden while the inside was perfectly moist!

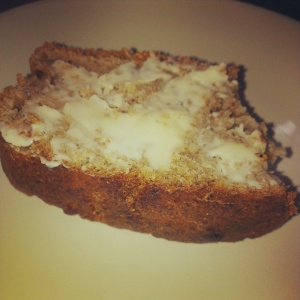
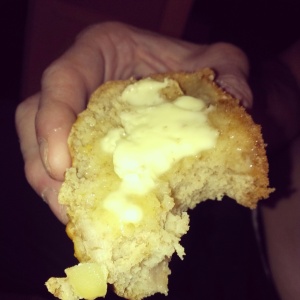
apple bread4The husband really liked it (with LOTS of butter) and I am pleased! The two loaves barely lasted the night! Thankfully I was able to enjoy a slice with coffee for breakfast!

Please let me know how you like this recipe. Do keep in mind that I added no sugar to this recipe. My aunt has made a batch and she added 1/4 cup sugar to her recipe. She says it is just perfect…plus my 7-year old cousin really enjoyed it! I hope you guys like it too!

Thanks so much for stopping by and have a great day!!

DIY Wedding Garter

Hello Everyone!

As mentioned in my previous post, I got married. It was a very small, very intimate wedding. It felt a lot more like an elopement since we kept it quiet and only told the 10 people who joined us that morning. Everyone else found out afterward, either through personal messaging or via facebook.

We really didn’t do much for the ceremony. We got married outside at the top of a mountain, so we left the decorations up to mother nature. The bouquet was made by the pastor’s wife. She really didn’t like my idea of making it the night before. And to be honest, the bouquet she made was 100 times better than the one I would have had to whip up the night before.

We didn’t send invitations, but we did send thank you cards to the people who missioned it out to Milton, and hiked up the trails to the awesome lookout point we had selected. The thank you cards were a DIY project which I managed to complete 2 days before the ceremony. I also managed to put together a very small hair piece and a bridal garter (which I forgot about and never got to use, now my niece uses it as a headband).

bridal garter DIYI took to pinterest before attempting to make one. I looked at various pics for inspiration. I knew I didn’t want the very popular lace band – I wanted something different. I had one problem though…all my things were already packed and all my boxes were already on route to Nova Scotia. So I worked with the very few materials I had left in my last-minute bags. This particular one was my inspiration (it is 100 times sweeter than the one I created! It is just lovely!)

The fabric for the flower came from a christening gown I had found at goodwill a while ago. I didn’t pack it since I had it on my “donate” pile. I followed a tutorial from The Polka Dot Closet for the flower. I ended up making 3 flowers. I figured I might as well just use up the piece I had cut up from the gown. One of the flowers was used in my hair clip. As you can see, I did not use sheer fabric on my flower. I quickly decided and convinced myself I would survive and be ok with using just one type of fabric.

Bridal garter DIYI wanted some pink on the garter and decided to make a tiny little pink bow. I had a tiny little heart from a necklace I quickly deconstructed and sewed it onto the pink bow. The flower centre came from Michaels. Thank goodness I hadn’t packed the items that were never put away in my craft room! (See the pink one in the above picture? I ended up using that one in my hair clip)

romantic garter At first I was very apprehensive about using just regular old elastic for the band. I didn’t want a lace band, but I wanted something a little bit prettier. After 2+ hours of not working on this project, I decided the elastic would just have to do. I convinced myself it would look just as good as the inspiration if I added some pearls!

I went a little wild and decided to add a bit of the chain from the necklace. It works great I think because it is dainty and not chunky at all! In order to get the right length of elastic, I simply wrapped it around my thigh and made sure it fit snug before cutting it. I then sewed up the two ends together making sure the elastic did not get twisted up. Then I put on the elastic band and decided where the pearls and chain would go. I also sewed those onto the elastic. Finally I sewed on the bow and the flower. Making sure both items covered any stitches from the previous step.

romantic garterI am quite happy with the way it turned out, even though I forgot to wear it! (It was a hectic day – We had the ceremony, then a small reception @ a restaurant, then drove mom & brother to airport, then packed up car and started road trip to Nova Scotia). Maybe I’ll wear it for our 1 year anniversary…if I ever get it back from my niece! She loves it! She looks like a little 1920’s girl! It’s really sweet on her.

Thanks so much for stopping by today. Hope you liked this little project!

Well it’s been a lifetime!!!!

I might be exaggerating, but it has been a while since I was last here…oh have I missed my blog!!!

Yes, a lot of things happened.

  1. The parentals (my word for parents) got divorced.
  2. The parentals sold our home house. (Home really is where the heart is!)
  3. I got married on top of a mountain (pretty cool – it was very elope-y since we skipped the whole big wedding, big reception idea and chose not to tell people until after it happened).
  4. I moved across the country…to the east. Of course the boys a.k.a Jake the husky and Oso the pup came with me.
  5. My mother and siblings moved across the country…to the west.

That was a quick update on my life thus far.

I am now a wife.

It feels different. The dude has been a GREAT husband thus far. I do miss the family. We talk via whatsup on the cell and skype on the computer quite often though. But it is still not the same. I’m sure I’ll be seeing them soon since we do want to make plans to spend some holidays together.

I now live in a small town, and yet I do not miss the city. Maybe I was never a city girl at heart. Who knows? My mother-in-law lives with us and thankfully we get along great! I had heard and read of so many horrible stories of mother-in-laws and daughter-in-laws not getting along that I was a little nervous about our living arrangements. But everything is working out just fine.

I hope to soon be sharing recipes with you again! I have LOTS of recipes that I need to try on my pinterest board!! The dude is a little picky though, so we’ll see if he’ll eat any of my experiments. I made tomato couscous 2 days ago and to my surprise, he ate it!

If you have any advice, suggestions or tips for me as I now start my life as a wife, please share them with me. We have only been married for 3 weeks and we’re still getting to know each other in these roles. The dude still opens the car door for me though…just like he used to when we were dating! 🙂

Thanks for stopping by and letting me share a bit of my life with you all. Have a great weekend!!!


DIY Tea Bags

Hello everyone!

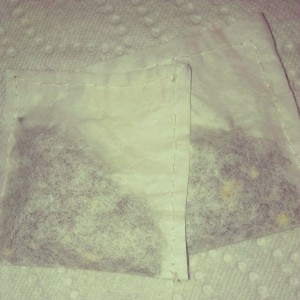
I got a little crafty last night while watching a latino soap opera (El Color de la Pasion). I had seen tutorials on Pinterest on how to make tea bags out of coffee filters, and I just had to try it. I didn’t buy anything since I had everything at home. It was one of the easiest DIY’s I have done in a while. It did take me a little over an hour to finish making the 8 bags of tea; I think that if you use a sewing machine, 8 bags could be done in a matter of minutes.

tea bags

Here’s what you’ll need:

  • coffee filters
  • scissors
  • needle and thread (or sewing machine)
  • loose leaf tea
  1. I started by straightening out my coffee filters and then folding them in half twice. You will get 4 layers.
  2. You can eyeball this part, but if you have already bought tea in tea bags, grab one and use that as template. I had both square and circular ones. I decided to go with the square ones this time around.
  3. Cut out your squares. Make sure that one of the sides of the squares is the folded edge (less sewing). You should have 2 pieces which will turn into 2 bags.
  4. Then go ahead and sew up one side then, fill up your bag. I added about 1 tsp of tea to my bags, and continue sewing all the way around.
  5. Repeat with your other bags and enjoy a nice cup of tea!

There are different ways of making your own tea bags. I have seen tutorials where sewing is not needed and all you need are coffee filters, tea, and a stapler like this tutorial here. I don’t mind sewing so I think I will be doing something like this next time! The hearts are just so cute!!

Thanks for stopping by and keep an eye out for my “Try it Out Tuesday” post. My brother asked me to make a fruity dessert…so far, I am thinking mangoes! I have about 3 hours before dinnertime so hopefully I can come up with something good and tasty! 🙂

Easy Turkey Noodle Soup Recipe

Hello world! I am alive!

I made a really yummy turkey noodle soup yesterday. I wanted nothing but soup. It was quite easy and fast to make since I didn’t want to be standing by the stove for too long.

I have been some specie of a zombie these past few days. I really don’t know (or recall) how I got quite a bit of packing done, walked the boys twice a day, and even did some laundry. My throat has been quite stubborn lately; it’s been bugging me and bugging me. My eyes just don’t want to stay open, and my head refuses to stop pounding. I will not crumble and give in to this bug that’s trying to overpower me. It will not happen. There are times when I just want to sit down and rest (like now), and there are times when I just go-go-go and then flop down and rest. I am taking it easy today. I think I feel better although my throat itches a bit.

This will be a recipe sans pictures, but I promise the result is quite good!

Ingredients

  • 2 tbsp evoo
  • 1 onion, thinly sliced
  • 4 garlic cloves, minced
  • 2 turkey breasts, cut into small cubes
  • 10 cups water (I used 4 cups homemade veg. broth and 6 cups water)
  • 1/2 cup celery, cut into small chunks
  • 1/2 cup frozen peas
  • 1/2 cup frozen corn
  • salt to taste
  • chunk of ginger, thinly sliced
  • 1/2 tbsp dried oregano
  • spaghettini pasta, 1/4 of 900g package
  • water for cooking pasta (as per package directions)

Directions

  1. On medium heat, saute the thinly sliced onion for 5 minutes or until soften. Make sure not to burn the onion. Add in garlic and cook for another minute stirring it around.
  2. Add in turkey breast cubes and let cook for 10 to 15 minutes, stirring frequently. Keep an eye on this, do not let it burn. Once the turkey breast is soft and a little brown, add water/broth. Stir a couple of times. Increase heat to medium-high and wait for it to boil.
  3. On another pot, cook pasta as per package directions. I did not measure this amount. I simply opened a 900g package of pasta and took out about 1/4 of it. I broke it in half and followed the cooking directions on the package. I used spaghettini pasta because it’s what I had on hand, and because it’s similar to the pasta used back home when making chicken soup. When the pasta is done, drain and set aside.
  4. When the soup starts to boil, add in the celery, peas and corn. Taste and add a little bit more salt if needed. Let the vegetables cook for another 5 to 10 minutes and turn stove off.
  5. Add drained pasta to soup while it is still hot. Stir. Add in ginger and oregano. Stir and serve!

I love the taste of ginger in soup. It is so refreshing, especially when you’re having an off relationship with your throat. I used a chunk of ginger about the size of my thumb and then thinly sliced it. Ginger is not everyone’s cup of tea, so if you spot it in your bowl of soup, don’t eat it, but if you do, embrace the flavour!

If you don’t have broth of any kind, you can also use bouillon cubes, but make sure to follow package directions. I’ve also seen a product called Vegeta at the grocery store, it’s some type of seasoning, but I think it has MSG.

I hope you enjoy this turkey noodle soup. If you do, please let me know. It is now time for my tea with lime and honey. Yum!

Thanks for stopping by!

Try It Out Tuesdays: Moist Chickpea Brownies

Hello everyone!

Today I would like to share a recipe for chickpea brownies. I found this recipe by pure chance. I was on Pinterest searching for low-fat, preferably vegan cake frosting. I found an interesting one that calls for avocados! I tend to check the related pins under a pin I like, and that’s how I found a pin for chickpea blondies. I added a few ingredients and changed an ingredient here and there, and that’s how I came up with nice and moist chickpea brownies!

Chickpea Brownie

Ingredients

  • 1 can (540ml) chickpeas
  • 2 medium bananas, mashed
  • 3 tbsp peanut butter
  • 1 tbsp baking cocoa
  • 3 tbsp honey (use maple syrup if vegan)
  • 1 tsp baking powder
  • 1 tsp vanilla extract
  • handful of semi-sweet chocolate chips
  • 1/4 cup flaked coconut

Directions

  1. Preheat oven to 350F and grease baking dish.
  2. Drain chickpeas, and blend until smooth. Scoop out creamy chickpeas to bowl.
  3. Fold in bananas. Add peanut butter, cocoa, honey, baking powder and vanilla extract. Mix well.
  4. Fold in chocolate chips and coconut flakes.
  5. Scoop out onto prepared dish and bake for 30-35 minutes or until toothpick inserted in middle comes out clean.
  6. Cool down and enjoy!

My mom wont get to try out these brownies until tomorrow. I’m keeping my fingers crossed she’ll love this recipe. I mean, it is healthier than the average brownie. It has chickpeas! I just wont tell her that part. It must stay a secret if I want her or my brother to at least try them.

Thank you so much for stopping by and please let me know if you try this recipe. Take care!